 Ingest
Ingest / Getting started
From your SD card to Lightroom.
Learn the flow in about five minutes. Plug in a card, review the keepers, add shoot details, then copy and verify. Save your setup when you’re ready.
You’ll need an Apple silicon Mac with macOS 15 or later, a card reader or photo folder, and a destination with enough space. Lightroom Classic is optional. Transfer time depends on your card, drive, and files.
The app shows this walkthrough on your first launch. Reopen it through Help → Walkthrough: Card to Lightroom, or type “walkthrough” in ⌘K. You can leave for Settings and return to the same step while the app stays open.
Plug in your SD card.
With Ingest running, insert your camera card. A newly detected card opens in Browse when Settings → Transfers → Open a card when it is inserted is enabled. It is on by default. If the card was connected before launch, choose it from Cards & drives.
Choose a source in the left sidebar, or press ⌘O to open a photo folder. Browse is where you review photos. Import… in the toolbar opens Import Settings; opening it does not start a copy.
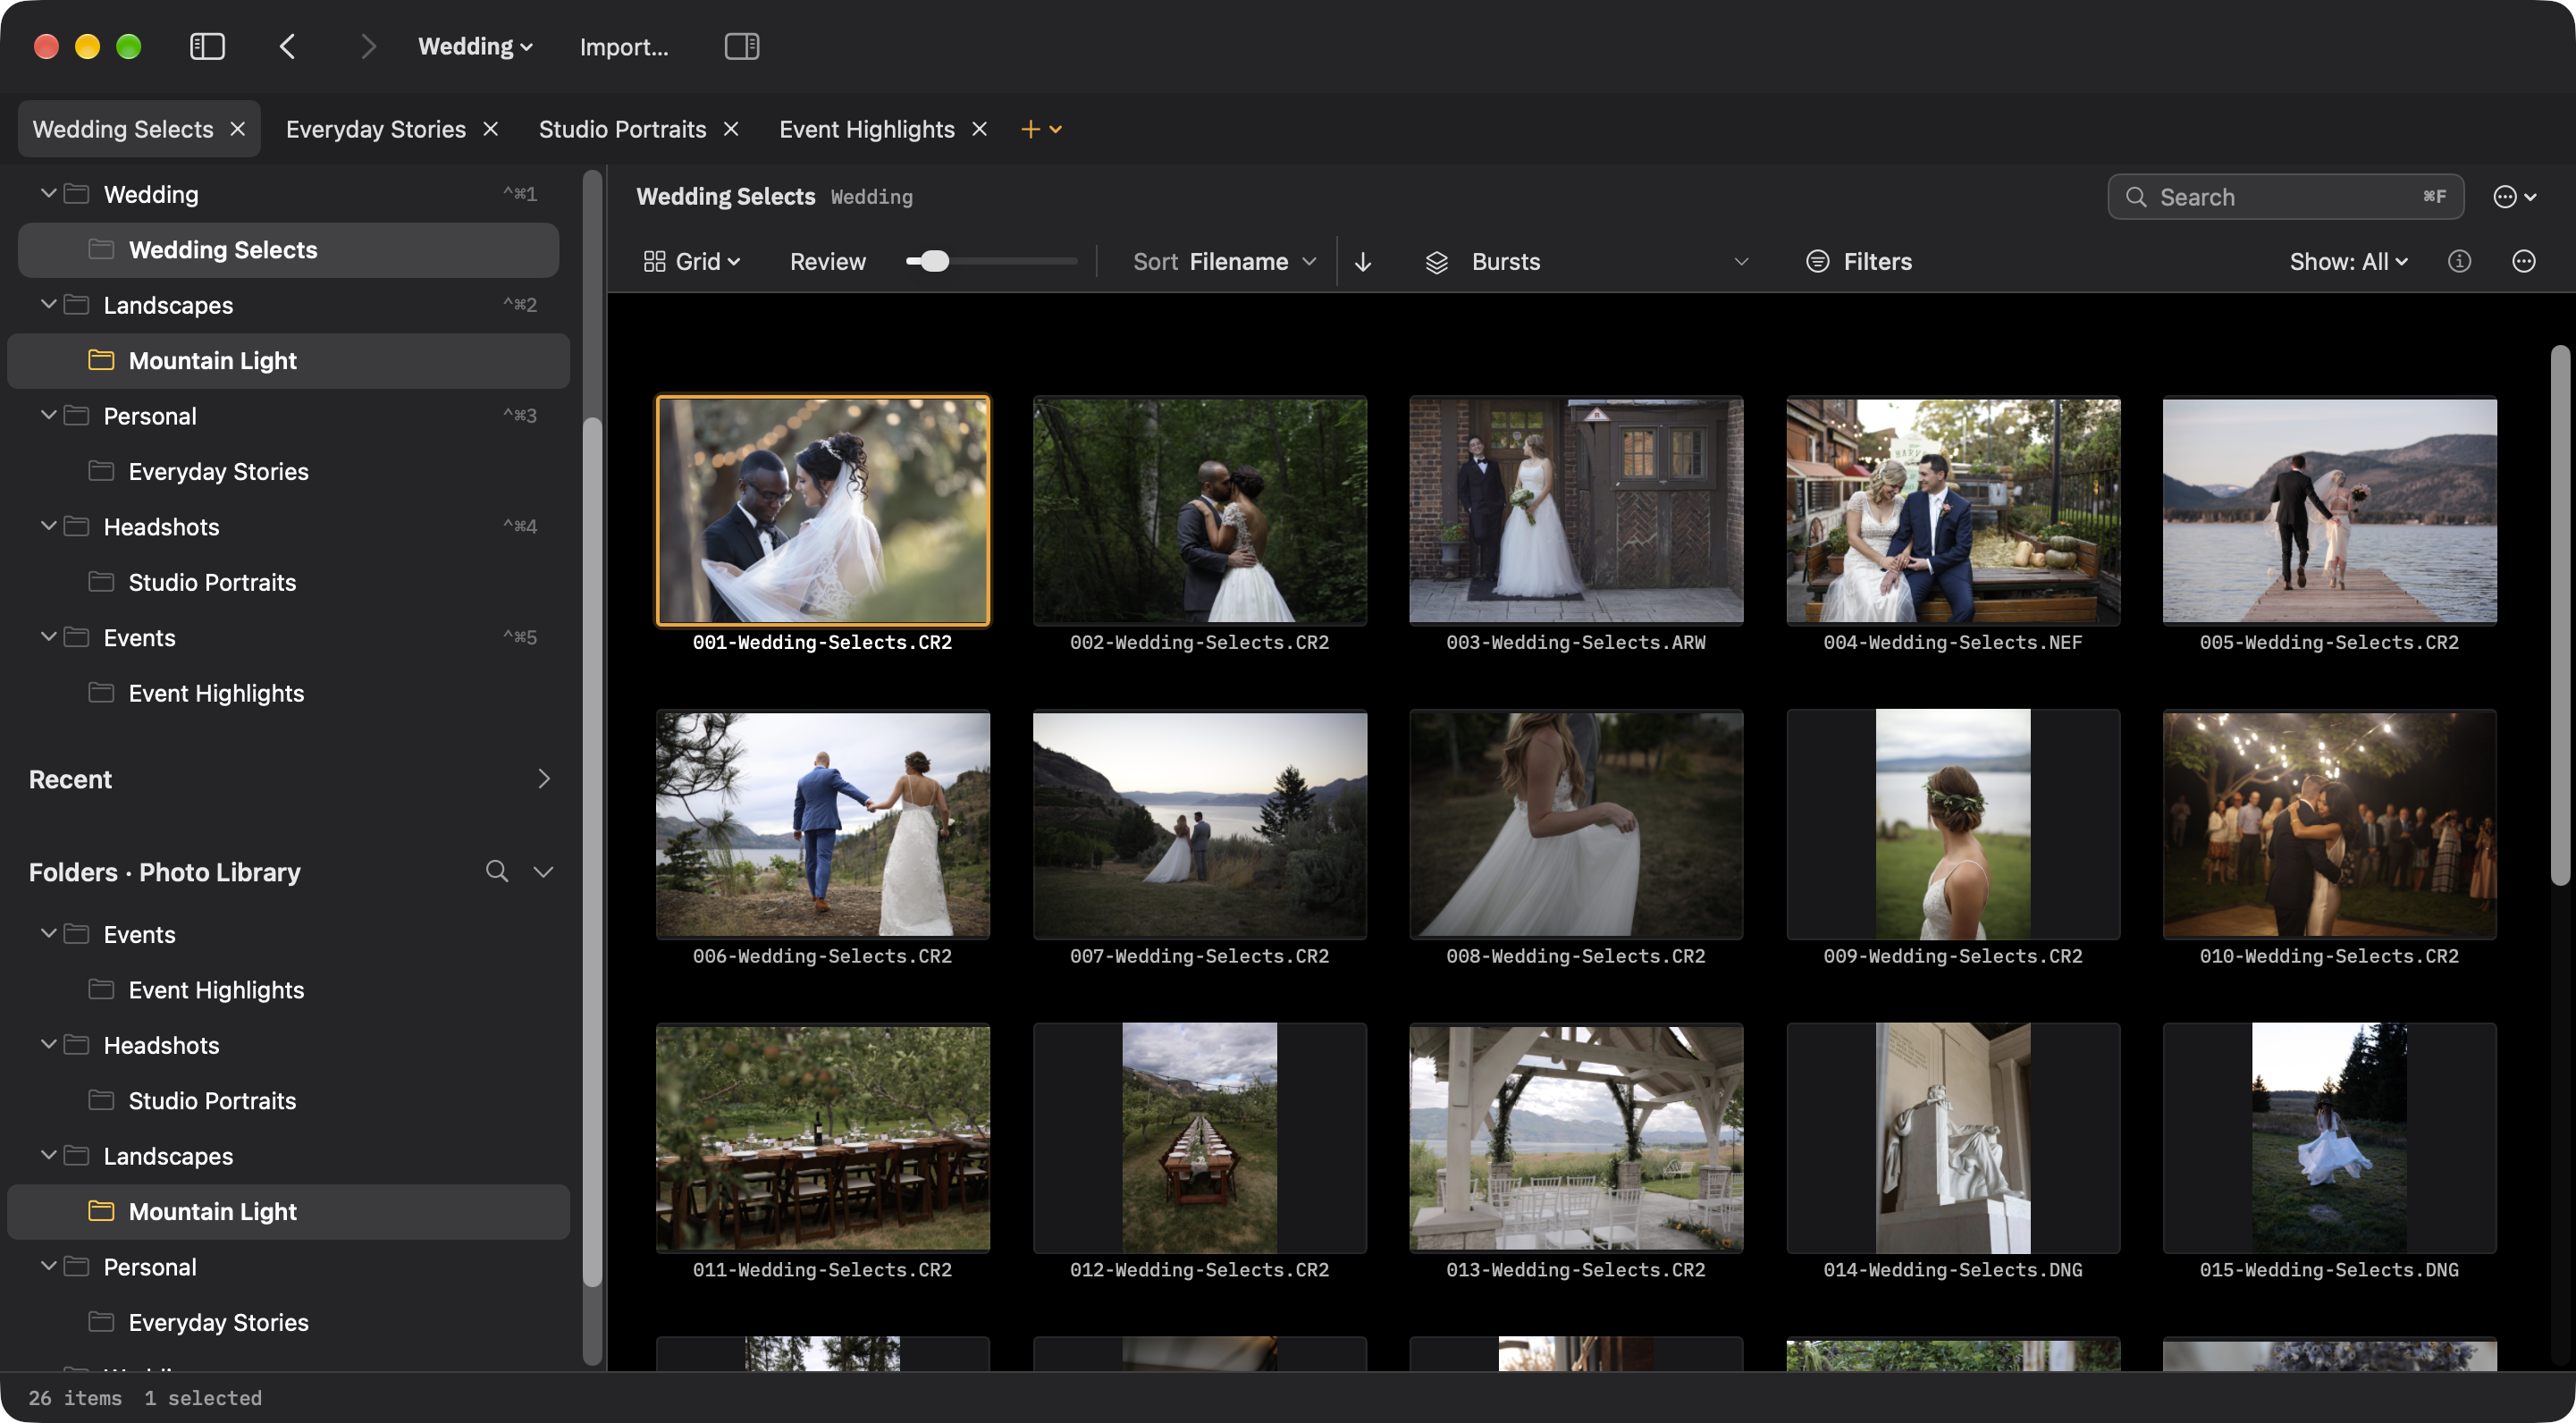
Start in Browse. Choose a card or folder, then review its photographs. Find it with ⌘K: type “Open Folder” or “Find Folder”.
Review your keepers.
Use the arrow keys to move through the shoot. Press T to tag a keeper; press it again to untag. Space opens a larger Preview and returns to your previous view.
Choose Show: Tagged above the grid to revisit your keepers. When you open Import…, its scope starts at Selected if photos are selected, otherwise All. Choose Tagged explicitly to copy your tagged photos. Browse filters and import scope are separate. Check the count in Import Settings; an empty scope stays empty.
Select two photos and press C to compare. In Preview, Z toggles Fit / 100%. Find Grid Loupe, Focus Peaking, and Detail Overlay in the View menu. Stack review keeps bursts and exposure brackets together.
These are the default keys. Your customized shortcuts appear in the app walkthrough. See the keyboard reference or open Settings → Shortcuts.
Find it with ⌘K: type “Tag” or “Show Tagged Only”.
Add shoot details with Metadata Assist.
Open Import…, then choose Edit Shoot Details beside Shoot details. Metadata Assist stages shared details for this import. Choose Keywords, Caption, IPTC Place, or GPS Location, or type ; to find a field. Tab completes remembered values.
Check Review changes. Use Edit Individual Fields… for detailed IPTC fields, or Find or use saved place… for a map location. Choose Use for Import to return the reviewed draft to Import Settings. Details go to verified copies; card originals stay unchanged.
For existing writable files, select photos in Browse and press ⌘’. Here, Apply writes the reviewed metadata to those files or their RAW sidecars. Check the photo scope before applying. Import shoot details and edits to existing files are separate uses of the same editor.
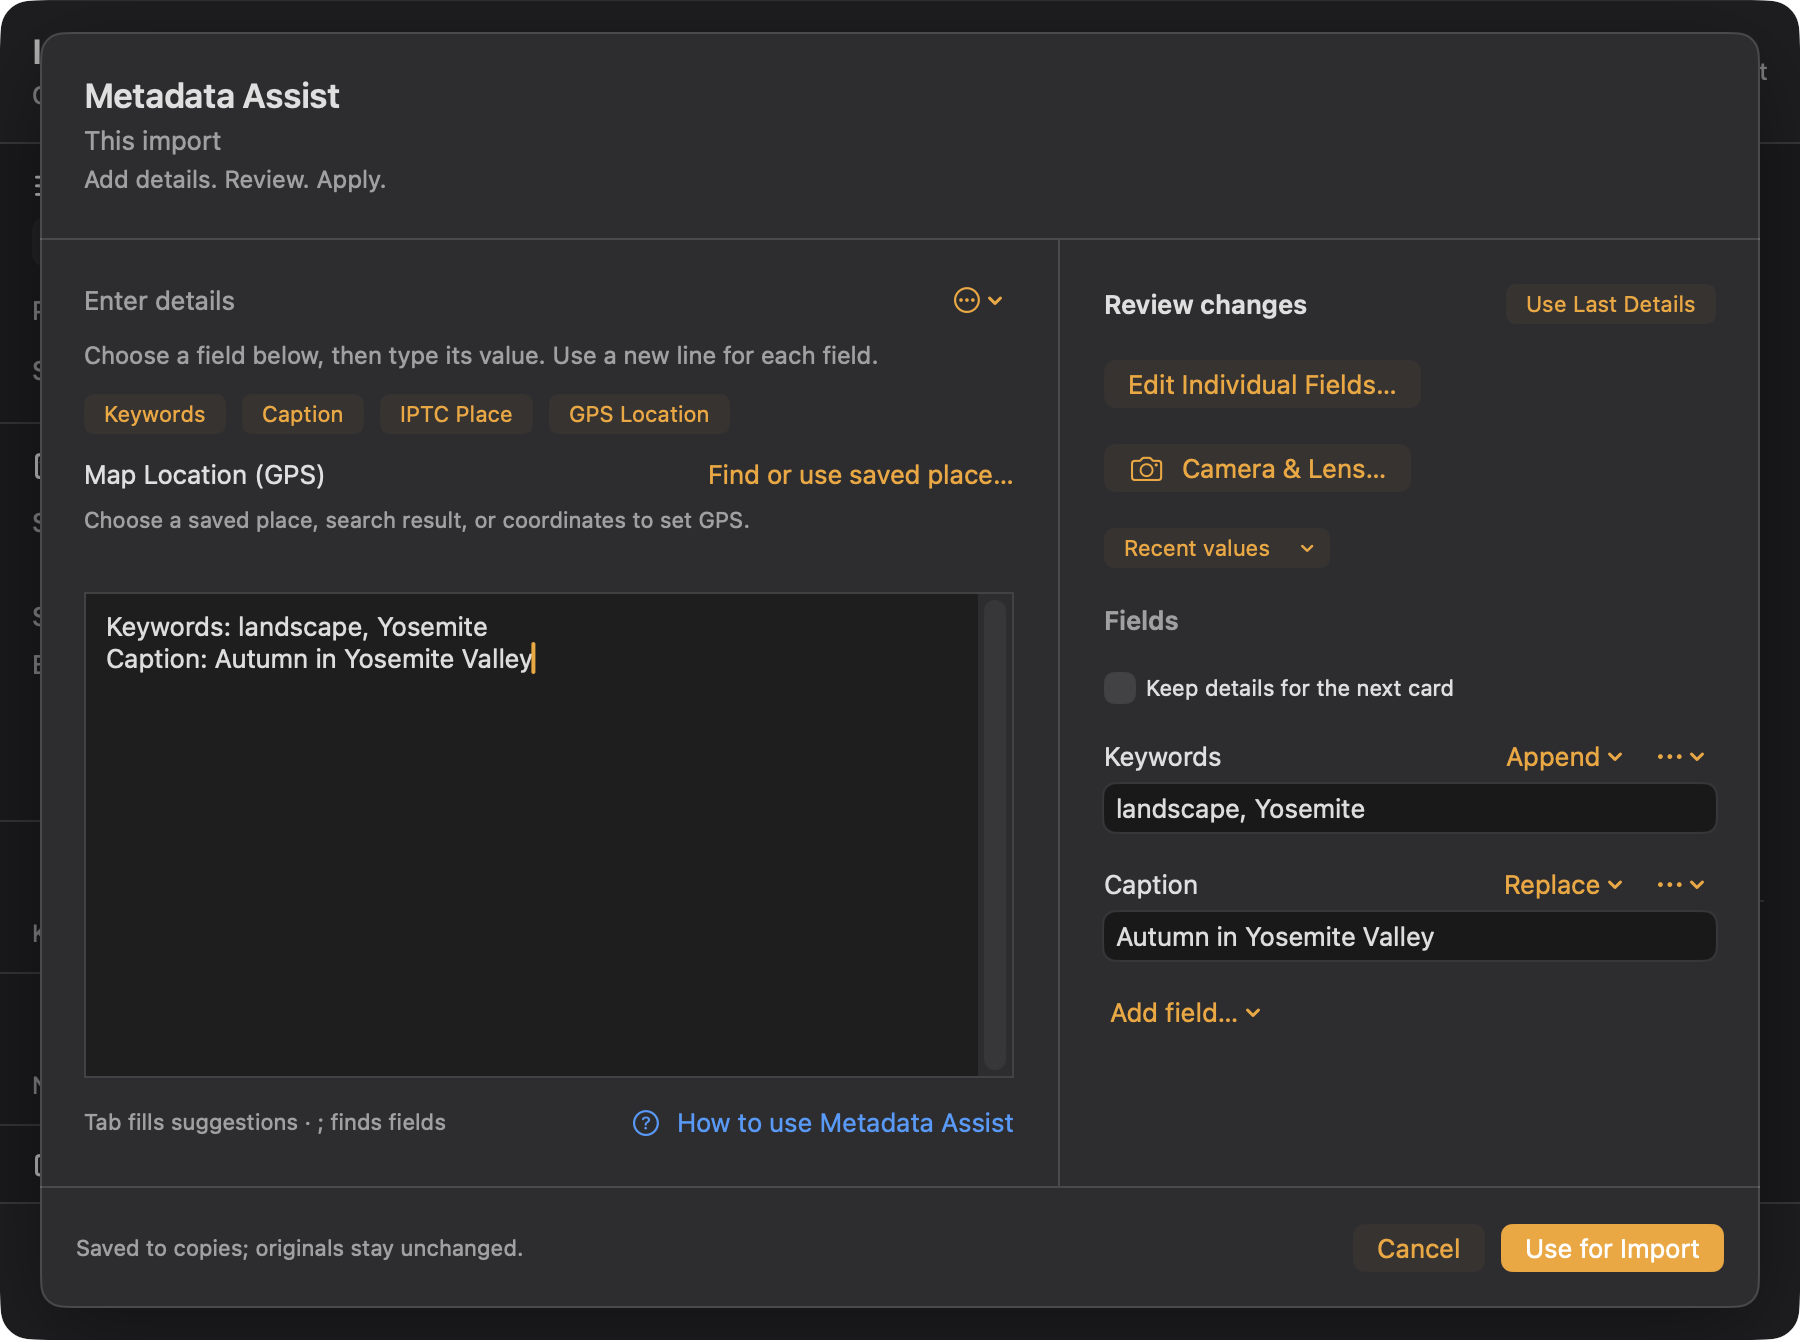
Review shoot details before using them for import. Copy, back up, and hand off to Lightroom.
In Import Settings, choose Save to under Destination. Add a backup destination on another physical drive if you want a second verified copy. Review Subfolders and Filenames, then inspect the output paths on the right.
Use a separate physical drive for Photo Backup. Ingest’s second verified copy is one part of a backup workflow: arrange off-site protection and editor/catalog backups separately. A Lightroom catalog backup does not back up your original photographs. See 3-2-1 backup guidance.
Expand After import and choose Open in Lightroom Classic. Check the photo count and both destinations, then click Import. After a successful copy, Classic opens the copied files for you to review and confirm its import.
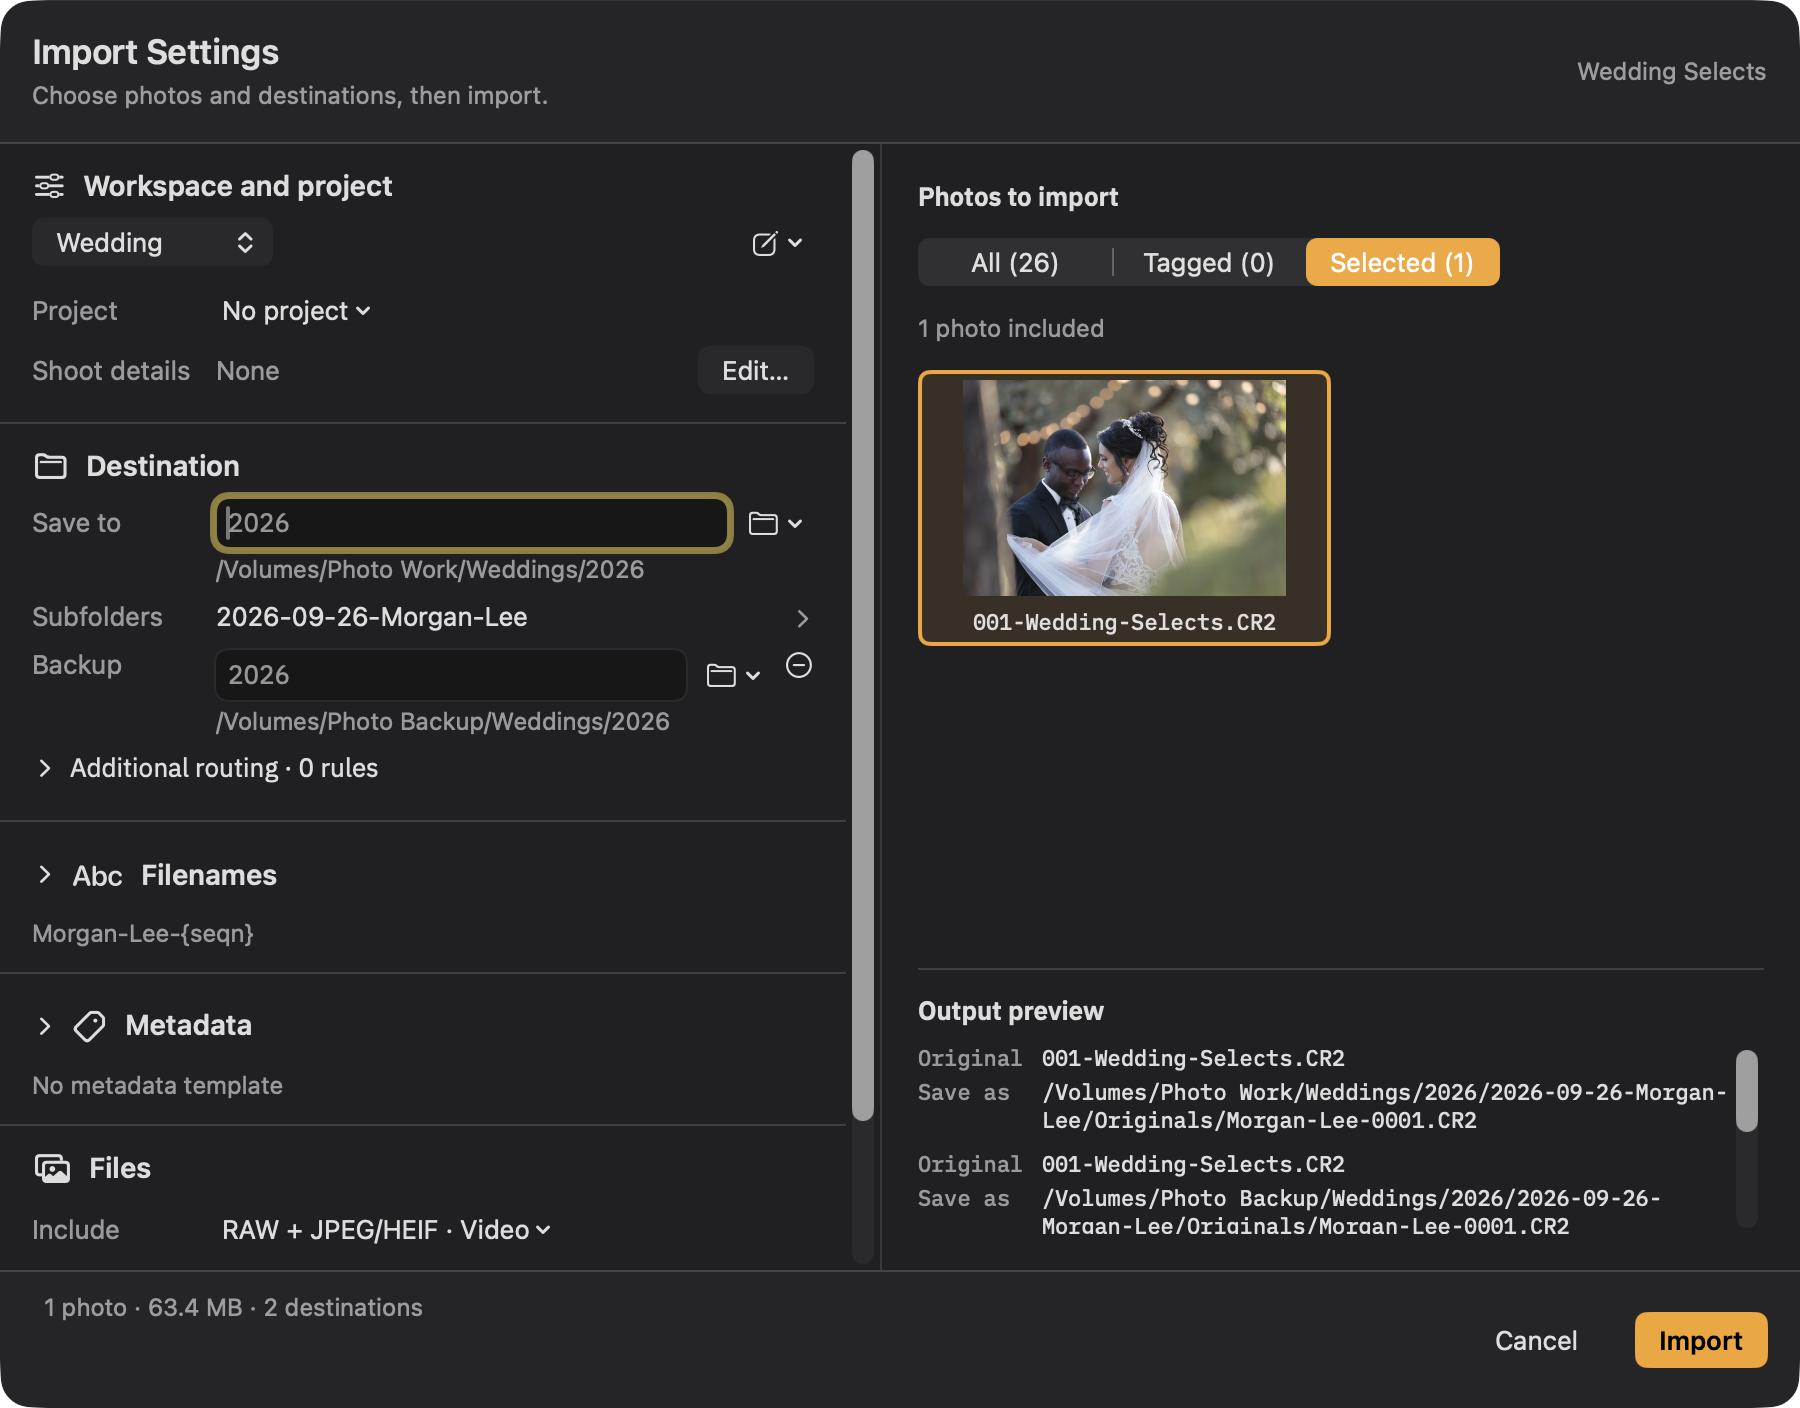
Review where both copies will go before starting. The screenshot uses disposable demo destinations. Classic must be installed. If its action is missing or the app lives elsewhere, configure it in Settings → Automation. You can also import the destination folder from Classic yourself. Set up the Lightroom handoff →
For your first import, keep Leave the card alone. Wait for the verification result before ejecting. Understand copy and verification results →
Save the setup for next time.
Create a workspace for each kind of photography in Settings → Workspaces. Save destinations, backups, naming, metadata, and viewing preferences instead of rebuilding the same job every time. The Ingest settings group destinations and naming first, with additional file, metadata, and card options available when needed.
Project folders that separate source photographs from outputs are an approach also used by Capture One Sessions. The homepage examples (Wedding, Landscapes, Personal, Headshots, Events) are adaptable starting points with fictional job names — not mandatory standards.
- Wedding: capture-order Grid, burst grouping, client filenames, and a backup.
- Landscapes: Split view, scene grouping, and original camera filenames.
- Personal: simple folders, Preview, and optional Apple Photos.
- Headshots: client filenames, paired RAW + JPEG, and video excluded from import.
- Events: event filenames and a workspace TSV file of caption codes.
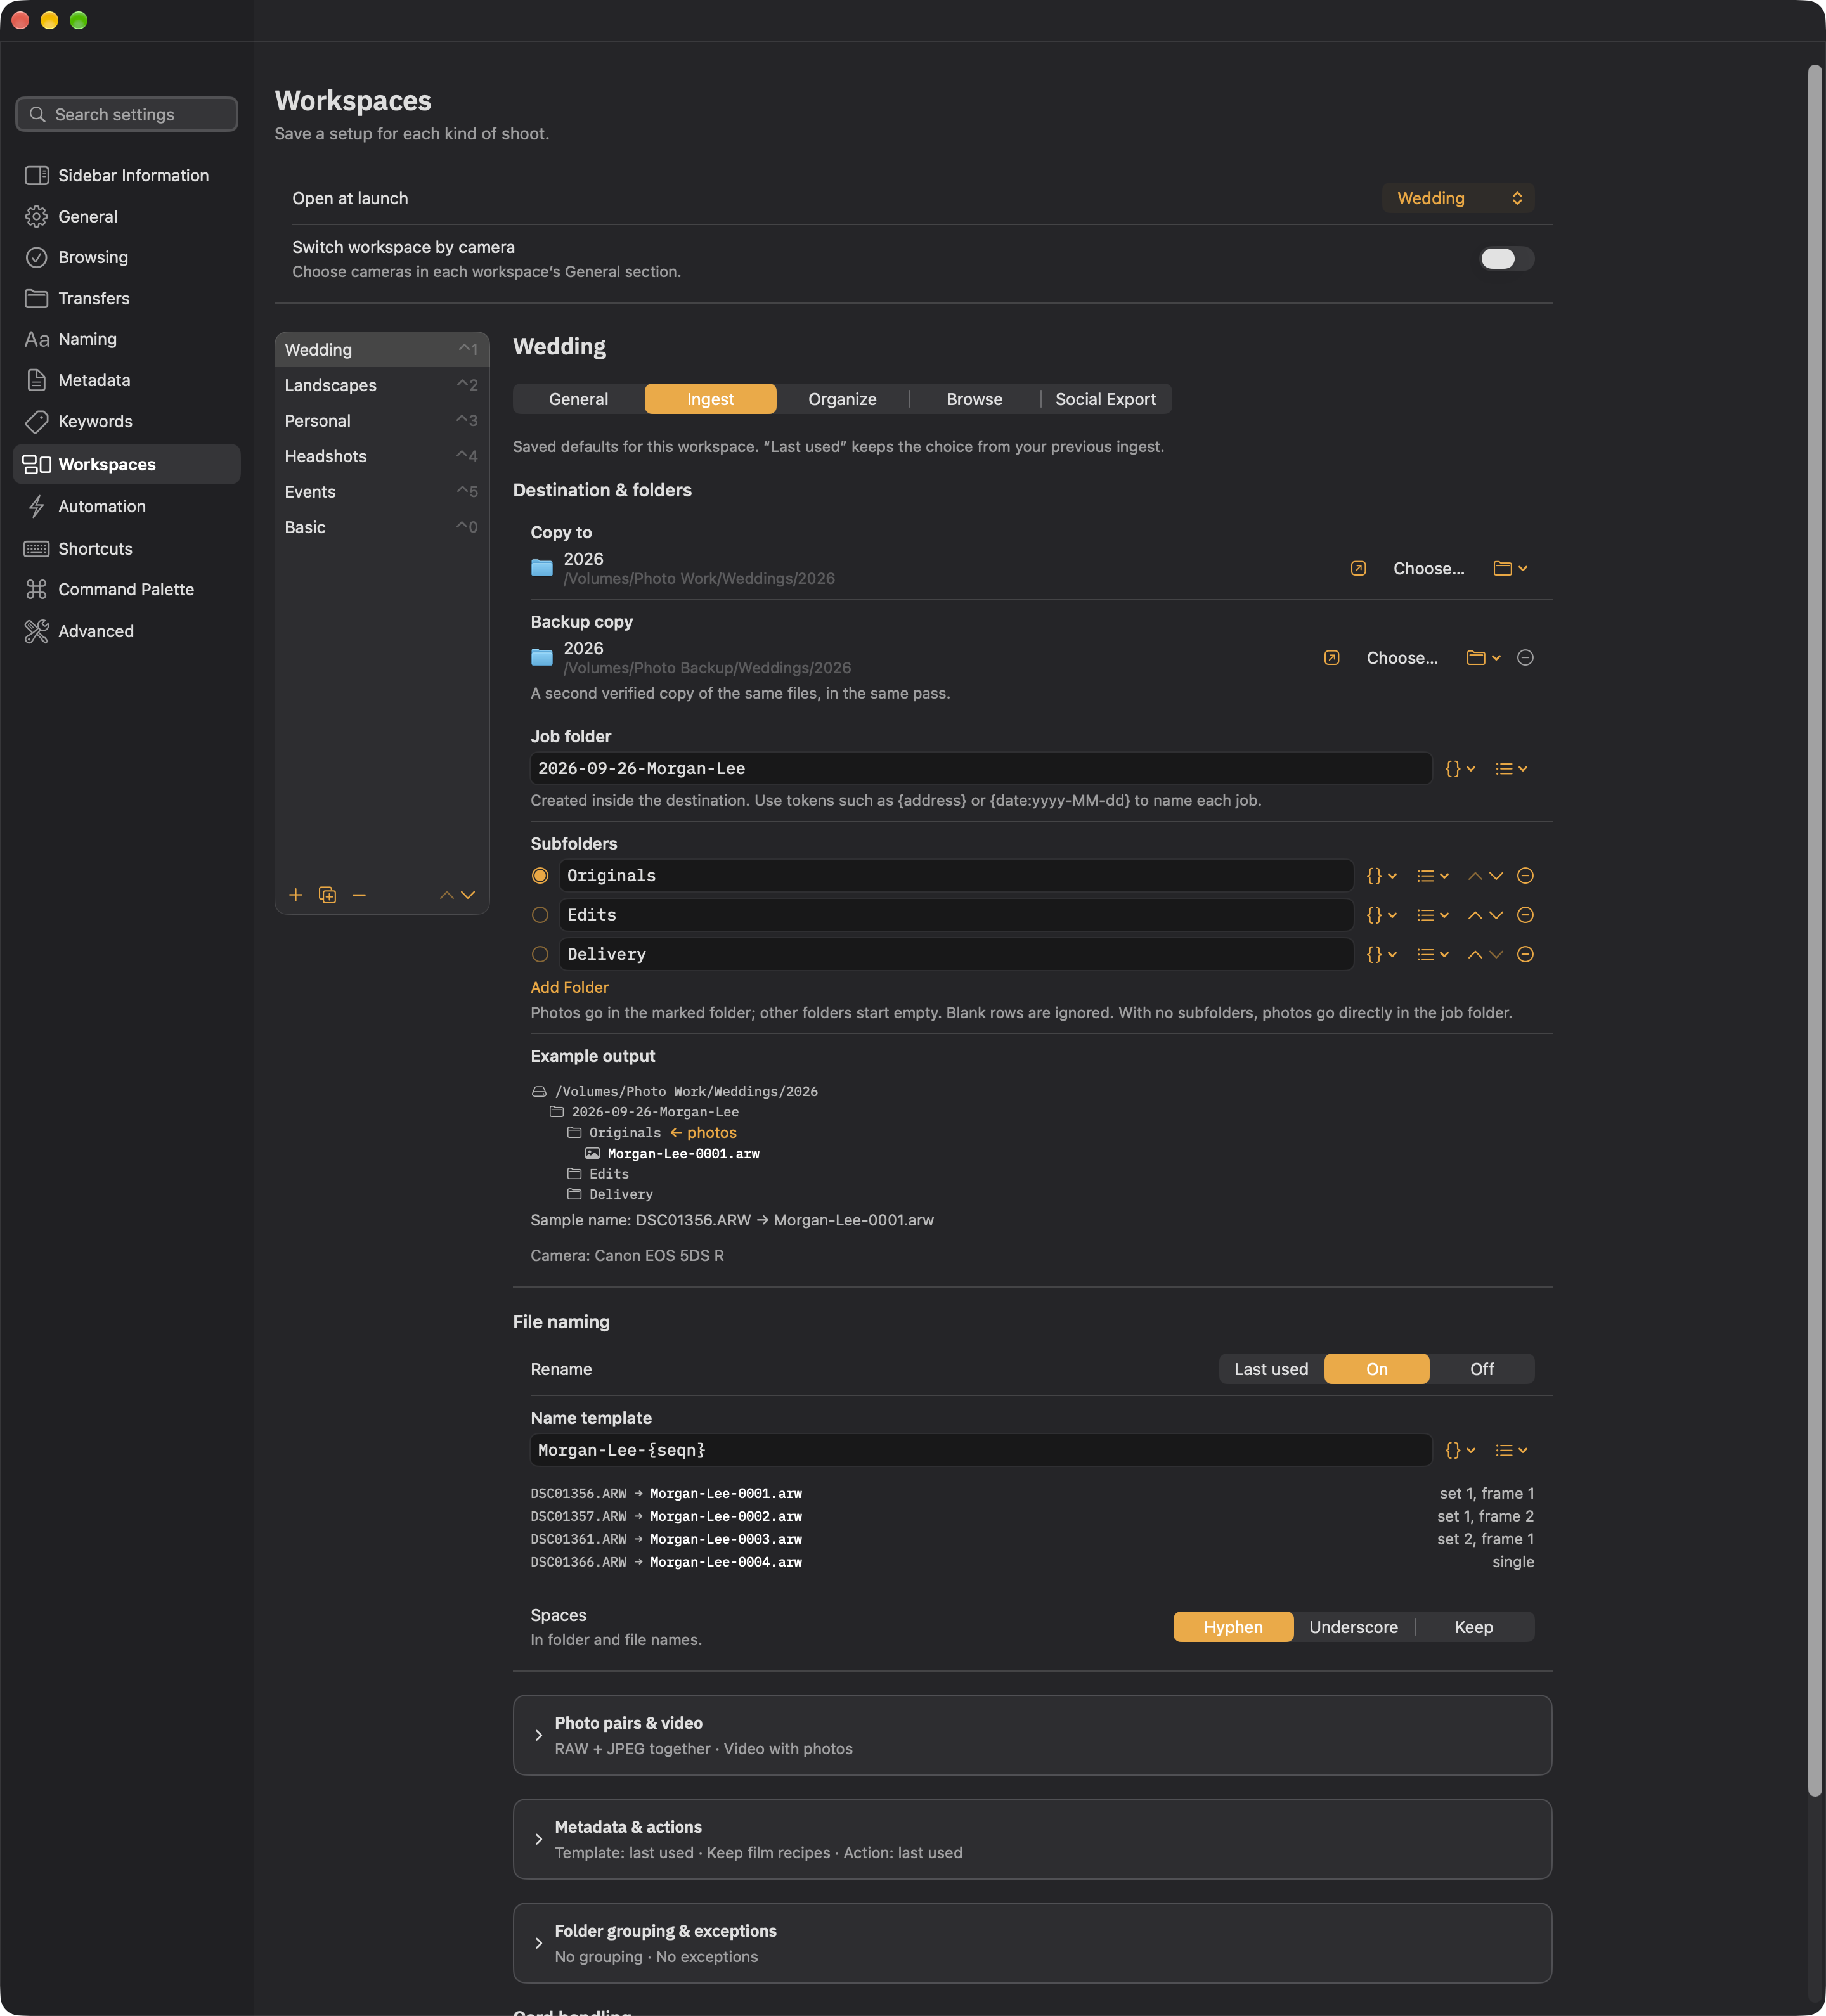
An example tailored setup. Create only the rules that fit your own work. Set up workspaces → Metadata presets → Automation →
Apple Photos has a global switch in Settings → General and a switch for each workspace. Keep it on for Personal and off for Headshots; the global switch must also be on. Learn about Apple Photos →
One shortcut to keep: ⌘K. In the app, type “Workspace” to find your saved setups, “walkthrough” to revisit these steps, or the name of whatever you want to do next. On this site, ⌘K searches pages and sections the same way.
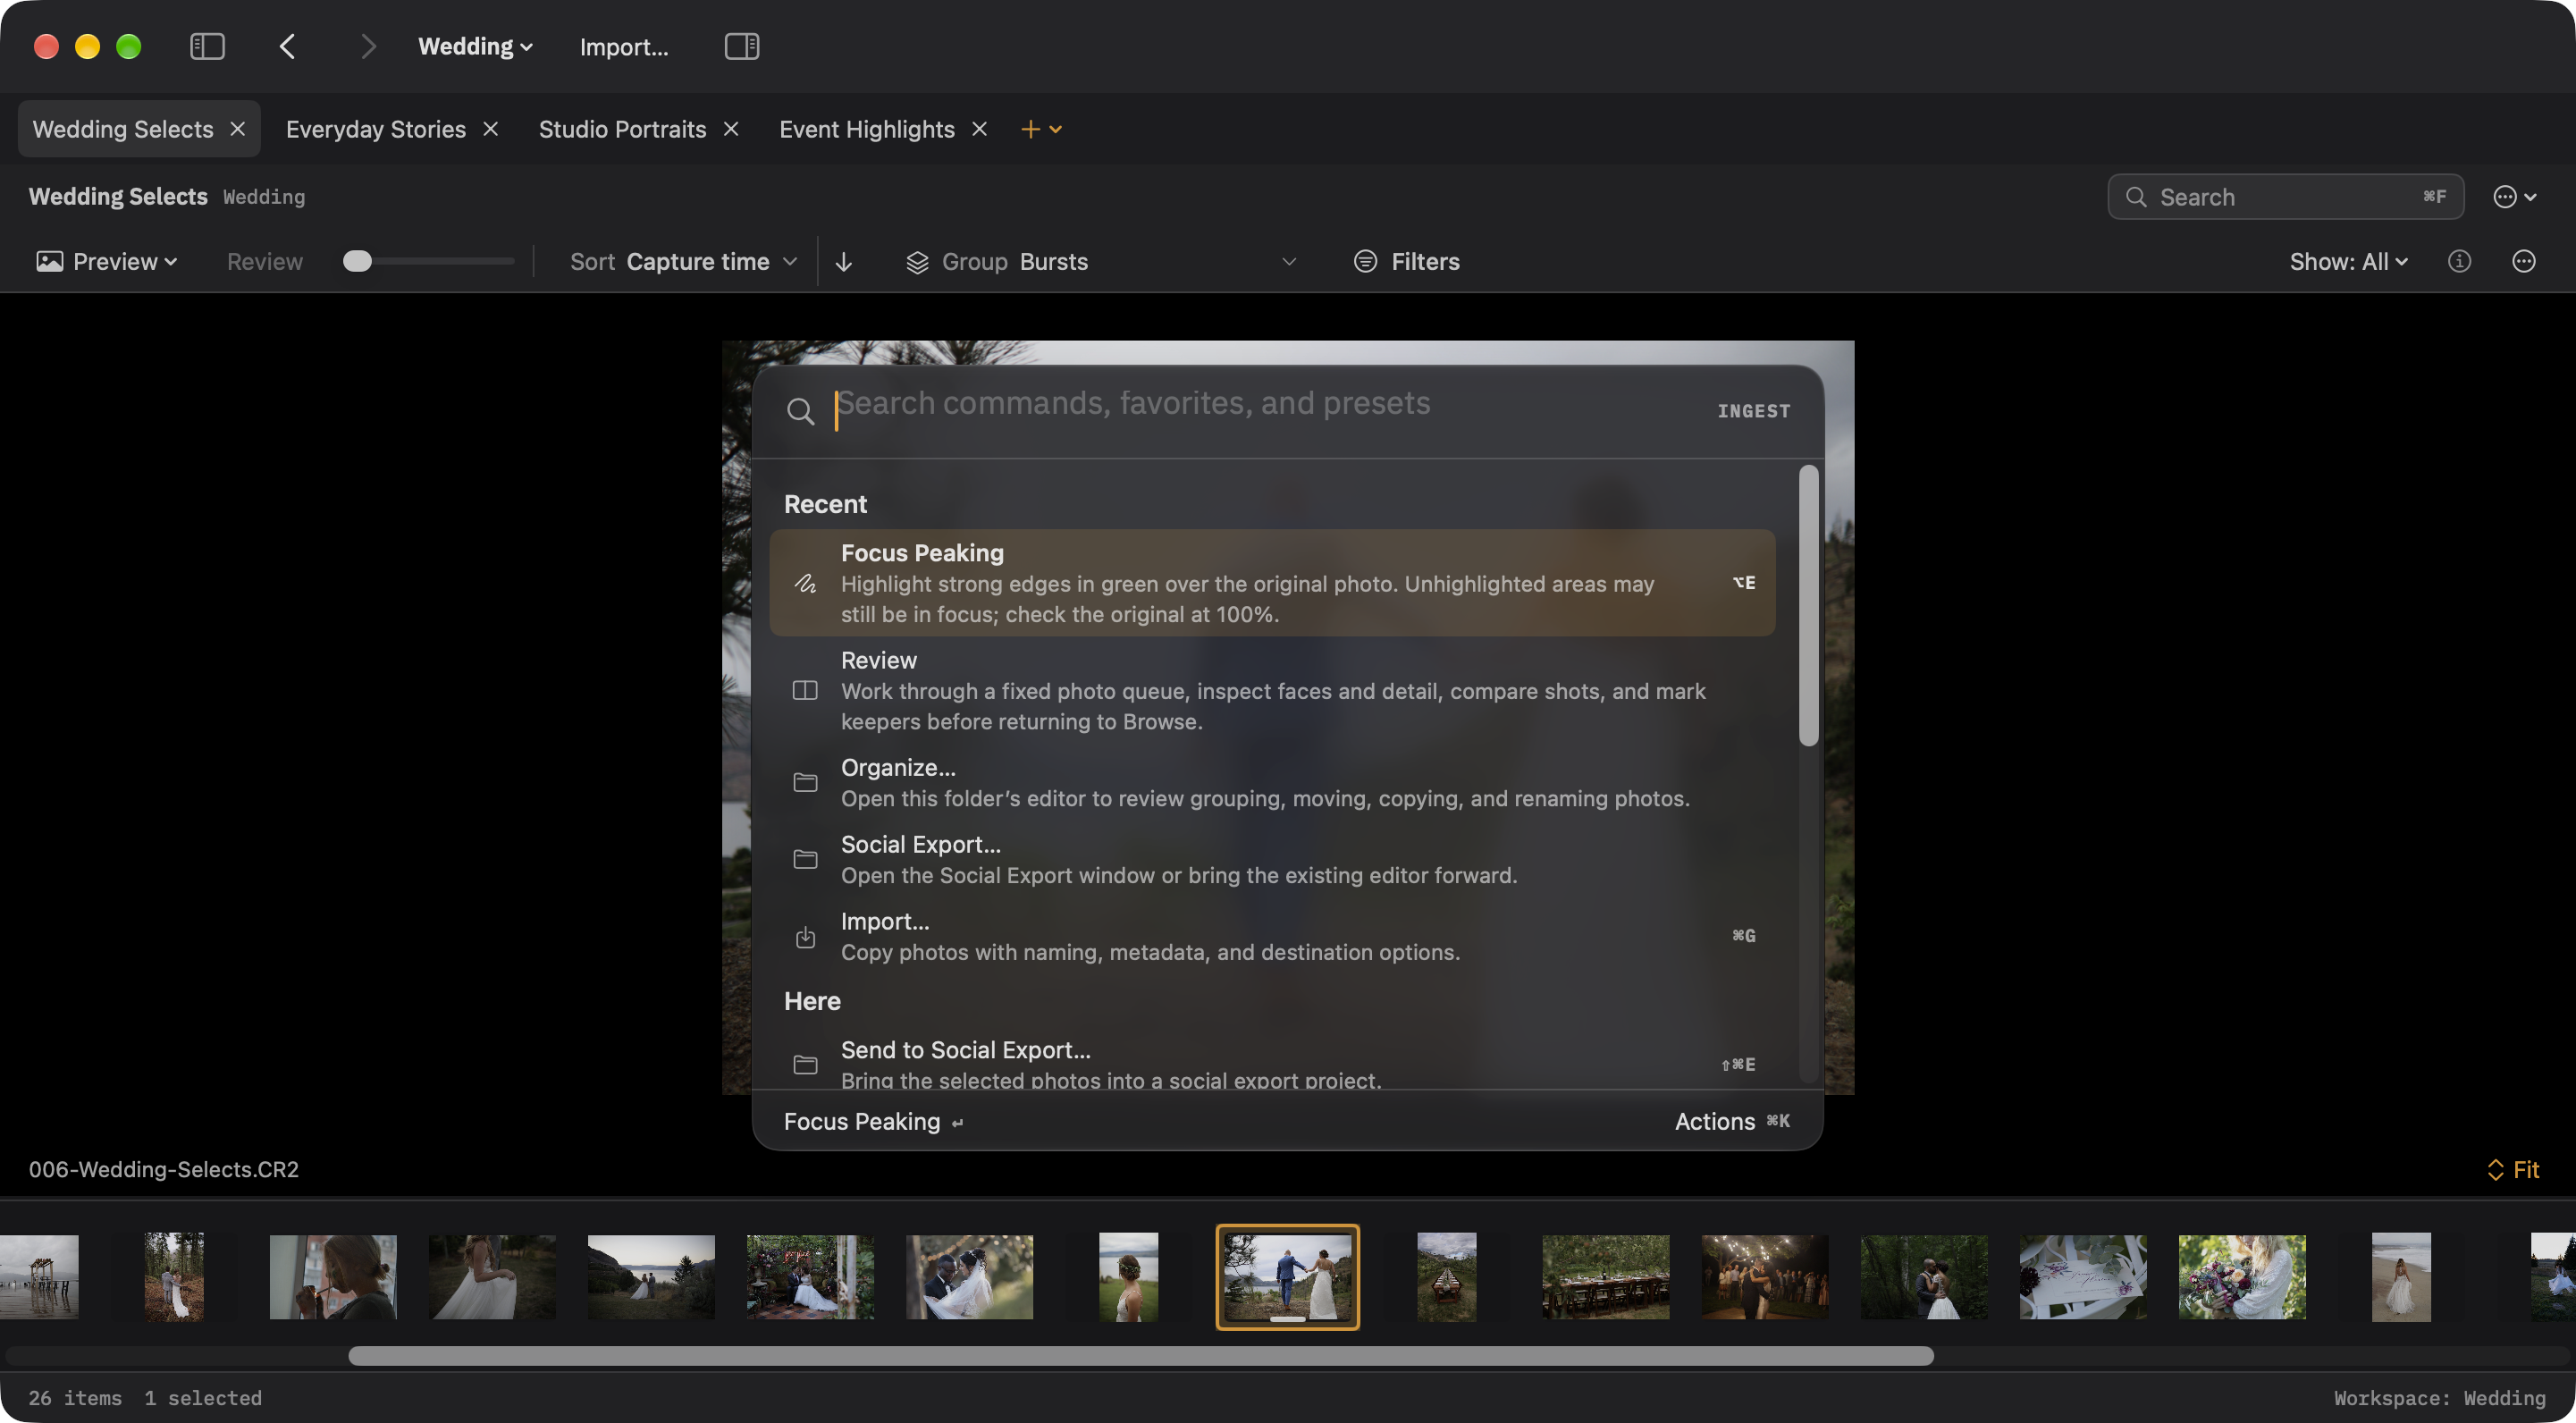
Commands, folders, and workspaces are one search away.